Leave Your Message

What Is the Best Way to Mix Mortar With a Paddle Mixer?

Mixing Mortar With Paddle Mixer looks simple, but consistent results depend on timing, water control, and tool selection. A paddle mixer can blend dry powder evenly, yet excessive speed may trap air or reduce workability. The American Concrete Institute’s ACI 530 guidance and ASTM C270 both stress that mortar performance depends on the correct mix design, not appearance alone. The 2024 Dodge Construction Outlook also links construction productivity with better material handling and repeatable site procedures.

Brian Trimble, a technical expert with the International Masonry Institute, offers a useful principle: “Mortar should be softer than the masonry it supports.” That warning matters when choosing a paddle, speed, and mixing duration. Stronger is not always better. A stiff batch can crack joints or become difficult to spread.

This guide explains how to prepare mortar with a paddle mixer, from adding water to checking the final texture. Use a clean bucket, a low-speed setting, and a suitable helical or mortar paddle. Add powder gradually, not all at once. Watch the edges. Unmixed material often hides there.

A practical batch should hold its shape on the trowel while remaining workable. If it slumps immediately, the water may be excessive. If it crumbles, the mixture may be too dry. These checks are useful, but they are not perfect. Temperature, sand condition, and product instructions can change the result. Always follow the manufacturer’s technical data sheet and wear suitable eye, hand, and respiratory protection.
What Is the Best Way to Mix Mortar With a Paddle Mixer?

Choosing the Right Mortar and Paddle Mixer

Choosing the right mortar matters more than using a powerful mixer. Thin-set mortar, masonry mortar, and repair mortar each need different handling. Read the product instructions carefully, especially the required water ratio and slaking time. More water may make mixing easier, but it can weaken the finished bond. I have learned this after seeing workable mortar crack during drying.

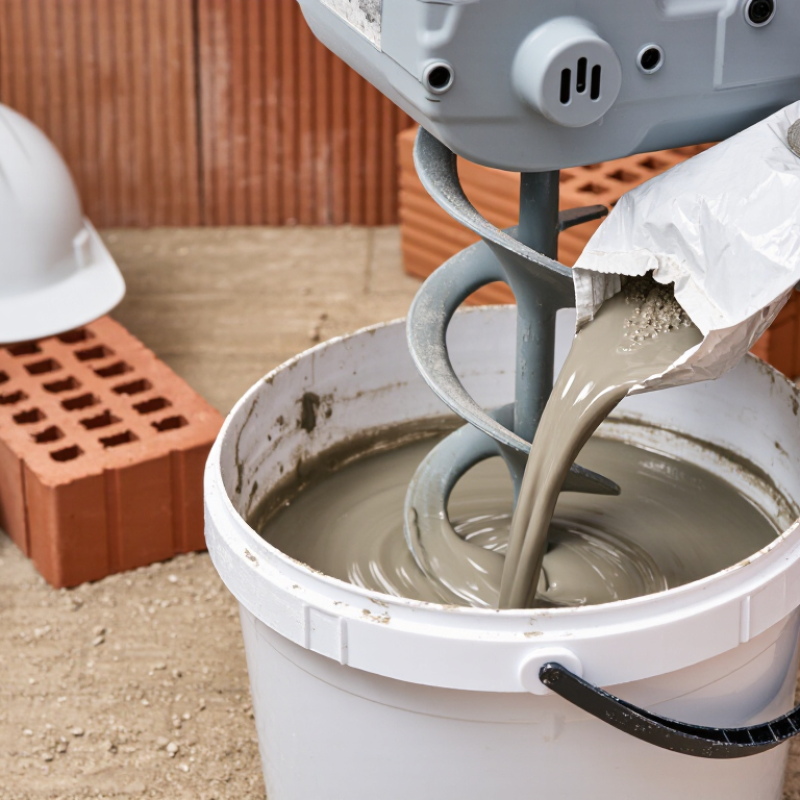
Match the paddle mixer to the batch size. A low-speed mixer with a suitable spiral paddle usually gives better control than a fast drill. High speed can pull too much air into the mortar and create splatter. Use a sturdy bucket with enough room for circulation. Keep the paddle below the surface when possible. This keeps the work area cleaner.

Add measured water first, then introduce the dry mortar gradually. Scrape the bucket sides between mixing passes. The mixture should look consistent, with no dry pockets or heavy lumps. Let it rest if the instructions require slaking, then remix briefly. I sometimes rush this stage, and the texture shows it. Mortar that feels creamy may still be too wet. Test a small amount with a trowel before covering a large area. Wear eye protection and gloves, because cement-based dust can irritate skin and lungs.
Preparing the Work Area and Mixing Equipment

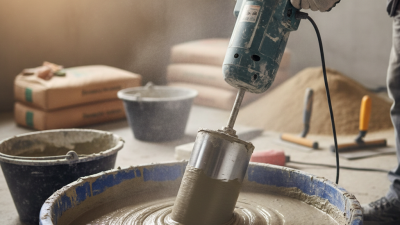
A clean work area makes mortar mixing safer and more consistent. Move loose tools, cables, and debris away from the mixing zone. Choose a flat surface that can support the bucket without rocking. Protect nearby floors from splashes, but avoid plastic that may become slippery. Keep fresh water within reach, and provide good ventilation when working indoors.

Inspect the paddle mixer before use. Check the cord, trigger, locking mechanism, and mixing paddle for damage. Disconnect the power before fitting or removing the paddle. Use a sturdy bucket with enough capacity for the batch, leaving room for movement. Read the mortar instructions carefully, especially the water requirement and mixing time. Too much water may weaken the finished material. Too little can leave dry pockets. I have found that rushing this check creates problems later.

Tips: Wear gloves, eye protection, and a suitable dust mask when handling dry mortar. Add measured water before the powder to reduce dust and clumping. Start at low speed, keeping the paddle below the surface. Stop occasionally, scrape the bucket sides, and inspect the texture. The mixture should look even, workable, and free of dry material. Clean the paddle immediately after mixing. Dried mortar is stubborn. Allowing it to harden is an avoidable mistake.

Adding Water and Mortar in the Correct Order

Mixing mortar with a paddle mixer starts with the correct order, not maximum speed. Read the mortar instructions and measure the water carefully. Pour most of the required water into a clean mixing bucket first. Keep a small amount aside for adjustment. Add the dry mortar gradually while the paddle turns at low speed. This reduces dust and prevents dry pockets from hiding at the bottom.

Let the paddle work through the mixture for several minutes. Move it around the bucket, including near the sides and base. The mortar should look even, smooth, and firm enough to hold a shallow ridge. Add the reserved water only in small amounts. Too much water can weaken the cured mortar and increase shrinkage. I once added water too quickly, and the mix looked easier to spread but performed poorly later.

Stop the mixer and scrape the bucket if needed. Then mix again briefly. Many mortars benefit from a short resting period before a final remix, but the product instructions should control this step. Avoid using high speed, since it can pull excess air into the mortar. Wear eye protection and gloves, and keep the paddle fully submerged while running. A slightly stiff batch is usually easier to correct than a soupy one. Still, forcing a dry mix can leave unblended powder behind. Check the texture with a trowel before application.

Mixing Mortar to the Proper Consistency

What Is the Best Way to Mix Mortar With a Paddle Mixer?

Mixing Mortar to the Proper Consistency

A paddle mixer gives better control than hand mixing, but speed matters. Start with clean water in a sturdy bucket. Add mortar powder gradually while the paddle turns at a low speed. This reduces dust and prevents dry pockets from hiding at the bottom. Keep the paddle below the surface. You want to avoid pulling excess air into the mix.

The correct mortar should look smooth, creamy, and firm enough to hold a shallow ridge. It should slide from the paddle slowly, not pour like soup. Not soup. If the mix feels stiff, add water in very small amounts. If it becomes watery, add dry mortar carefully and remix. Guessing with large additions often creates uneven strength.

Mix the material until the color and texture appear consistent. Scrape the bucket sides with a margin trowel, then blend again. Allow the mortar to rest when the product instructions require it. This short pause helps the ingredients hydrate properly. Remix briefly before application. I once judged consistency only by appearance and ignored the temperature; the mortar stiffened faster than expected. That mistake taught me to check working time, surface absorption, and weather before mixing a full batch. Wear eye protection and gloves, and follow the product’s stated water ratio. The paddle should move steadily, without forcing the motor through a heavy, dry mass.

What Is the Best Way to Mix Mortar With a Paddle Mixer? - Mixing Mortar to the Proper Consistency

Use the following practical guidelines to mix mortar evenly, control dust, and achieve a workable consistency without overwatering the material.

Mixing Dimension Recommended Practice Typical Range or Target Why It Matters
Water Measurement Measure clean water accurately before adding the mortar powder. Start with the lower end of the specified range and adjust gradually. Use the water quantity stated on the product instructions; do not estimate by eye. Too much water can reduce strength, increase shrinkage, and cause separation.
Initial Water Addition Place most of the required water in the mixing bucket before adding the dry mortar. Approximately 70–80% of the measured water initially. This helps wet the powder evenly and reduces dry pockets at the bottom of the bucket.
Adding Dry Mortar Add the powder slowly while running the paddle at low speed. Keep the paddle head below the surface to limit air entrainment and dust. Add in several portions over about 30–60 seconds. Gradual addition creates a more uniform mixture and improves dust control.
Paddle Mixer Speed Use a low-speed setting and increase only as needed to circulate the material. Common practical range: about 300–600 revolutions per minute. Lower speed helps reduce splashing, air entrainment, and unnecessary heat buildup.
First Mixing Cycle Move the paddle through the bottom, corners, and sides of the bucket while maintaining steady control. Mix for approximately 2–3 minutes after all powder has been added. Scraping the sides and bottom helps eliminate unmixed powder and lumps.
Slaking or Rest Period Stop the mixer and allow the mortar to rest before the final remix. Typically 5–10 minutes, unless the product instructions specify otherwise. The rest period allows dry ingredients and binders to hydrate more completely.
Final Remix Remix at low speed without adding extra water unless the instructions specifically permit adjustment. Approximately 1–2 minutes. A final remix improves uniformity and restores workability after the rest period.
Proper Consistency The mortar should be smooth and cohesive, hold its shape on the trowel, and spread without excessive slumping or crumbling. Firm enough to stay in place, workable enough to spread with moderate pressure. Correct consistency supports adhesion, coverage, and consistent joint or bed thickness.
Consistency Adjustment If the mix is too stiff, add a very small amount of water and mix thoroughly before reassessing. Never correct a dry mix by pouring in a large quantity at once. Make small, controlled adjustments only within the specified water limit. Small adjustments reduce the risk of overwatering and uneven performance.
Overmixing Prevention Stop mixing once the mortar is uniform and workable. Avoid running the paddle longer than necessary. Use the shortest mixing time that achieves a lump-free blend. Excessive mixing can introduce air and may change the material’s working characteristics.
Bucket Management Use a clean bucket and clean paddle. Remove hardened residue before preparing a new batch. Clean equipment for every batch. Old residue can contaminate the mix and create lumps or inconsistent texture.
Batch Size Prepare only the amount that can be placed within the mortar’s stated working time. Follow the product’s working-time instructions; avoid oversized batches. Mortar becomes less workable as it begins to set and should not be retempered unless permitted.
Water and Temperature Use clean, cool-to-moderate-temperature water and protect the mix from extreme heat, cold, wind, and direct sun. Keep materials within the temperature limits stated in the instructions. Temperature affects hydration, setting time, and available working time.
Quality Check Before Use Check for dry powder, hard lumps, excess water, separation, or a glossy layer of water on the surface. Use only when the mixture is uniform and cohesive. A visual and handling check helps identify an incorrectly mixed batch before application.

Important: Mortar formulations differ by application and product type. Always follow the specific water ratio, mixing time, rest period, working time, and safety instructions provided for the mortar being used.

Cleaning and Storing the Paddle Mixer Safely

What Is the Best Way to Mix Mortar With a Paddle Mixer?

A paddle mixer works best when mortar is added gradually to clean water. Keep the paddle below the surface to reduce splashing and trapped air. Use a steady speed, and pause to scrape material from the bucket sides. I used to lift the spinning paddle too quickly. That mistake covered my gloves and floor with wet mortar.

● Cleaning should begin immediately after mixing. Disconnect the power before touching the paddle or shaft. Scrape off thick mortar with a plastic or wooden tool. Avoid striking the paddle with metal, which can damage its edges. Rinse the attachment outdoors or over a suitable collection area, not directly into a household drain. Keep water away from the motor housing and ventilation slots. Keep it unplugged. Wipe the housing with a damp cloth, then dry it carefully.

Inspect the cable, trigger, chuck, and shaft before storage. Look for hardened mortar, cracks, loose fittings, or unusual movement. A small defect can become dangerous during the next mixing job. Let every part dry fully before placing the mixer away. Store it upright in a dry, ventilated cabinet, with the cable loosely coiled. Do not hang heavy tools from the cord. My earlier storage routine was too casual; dust entered the vents, and cleaning took longer later. The equipment manual should guide any lubrication or part replacement.